Lighting is another major factor. Orchids need bright, indirect sunlight to produce blooms. Placing them in an area with insufficient light can result in weak growth, while too much direct sunlight can scorch the leaves.
The condition of the roots also greatly affects blooming. If the roots are damaged, rotten, or unable to absorb nutrients due to compacted or old substrate, the plant will lack the energy needed to flower.
Additionally, a lack of essential nutrients—such as nitrogen, phosphorus, and potassium—can prevent orchids from producing vibrant blossoms. These deficiencies often occur when the plant is not fertilized properly or when it grows in depleted potting material.
Step 1: Orchid Rejuvenation – Pruning and Root Care
Before introducing the revitalizing water, you should prepare your orchid by removing dead or damaged parts. This allows the plant to focus its energy on new growth.
Carefully trim away leaves that have turned yellow or brown.
Gently remove the orchid from its pot and free the roots from the substrate. Be careful not to damage them.
Using sterilized scissors, remove any parts of the stem that appear blackened or unhealthy.
Rinse the roots under running water to remove dirt and debris.
Use a paper towel to pat them dry.
To prevent infections, drip a small amount of wax from a lit candle onto the cut part of the stem. Then place the orchid in a cool, dry place for about 24 hours before replanting.
This step is crucial because it ensures that your orchid is free from infections and ready to absorb nutrients from the revitalizing solution.
Step 2: Making Revitalizing Garlic Water
Garlic is a natural antifungal and antibacterial agent that strengthens plant roots, helps prevent diseases, and promotes growth. This simple garlic-infused water acts as a tonic to rejuvenate your orchid.
How to Prepare It
Take three cloves of garlic and chop them finely.
Place the chopped garlic in a jug containing one liter of water.
Cover the jug with a lid and wrap it with a towel to keep out light.
Let it sit for 24 hours so the beneficial compounds can infuse into the water.
Strain the liquid to remove the garlic pieces before using it.
You now have a natural solution that may help support your orchid’s recovery.
Step 3: Revitalizing Your Orchid with Garlic Water
see continuation on next page
Next »»
Step 3: Revitalizing Your Orchid with Garlic Water
Once your orchid has been pruned and allowed to dry, you can introduce the garlic water.
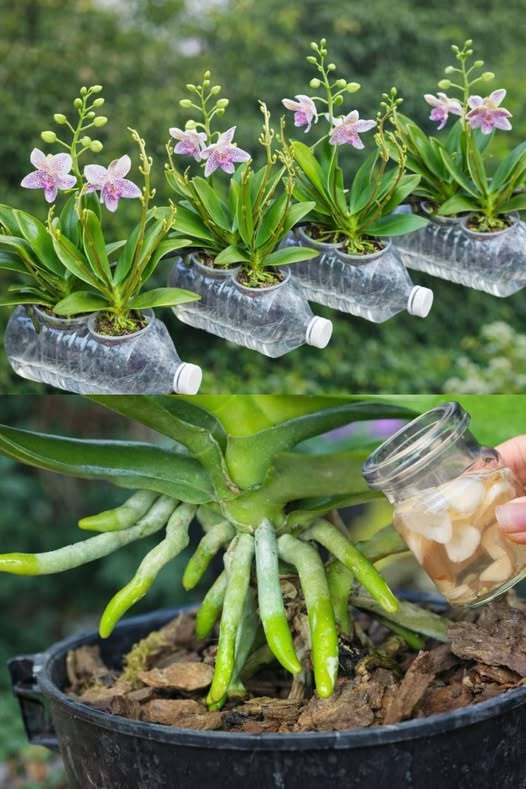
Place the orchid’s roots in a glass of garlic water for about 20 minutes. This can help clean the roots and encourage new growth.
The solution can also be lightly sprayed on other plants to help deter pests.
Use a cotton pad to remove excess moisture afterward.
Next, choose a clean pot and add a suitable orchid substrate, such as bark or sphagnum moss.
Allow the roots to dry for about 30 minutes to prevent excess moisture, which could lead to rot. Then carefully place the orchid back into the pot and ensure the roots are supported by the substrate.
Water the plant well so it can adjust to its new environment.
Keep the orchid in a stable environment at around 20°C (68°F) and away from direct sunlight. To maintain humidity, you can cover the pot with a plastic bottle that has small holes for airflow.
With proper care, your orchid may begin developing new leaves within a couple of weeks.
Step 4: Stimulating Growth with Ginger Water
Ginger contains antioxidants and bioactive compounds that may help support root health and encourage flowering.